
2 Detailed Steps of Painting Tree Bark Wood Texture in Watercolor

Sagada, a town in Cordillera Mountains, within the Mountain Province in the Philippines, is one travel destination I accomplished in early 2020 just right before the Covid-19 Pandemic disrupted the world.
I was always in awe with the details of any tree, particularly the bark; and this photo that I took in Sagada inspired me to finally paint one.
For this blog post, I’d like to show the step-by-step process of how I achieved this painting especially detailing on the proess of painting tree bark wood texture in watercolor.
The Reference Photo
Here is the shot I took after we trekked a mountain in Sagada. It was quite an experience waking up very early for a trek up a mountain in pitch dark, and reaching the peak just a few minutes away from the magnificent view of the sunrise.
As we trekked down, we came by this spot in the woods.
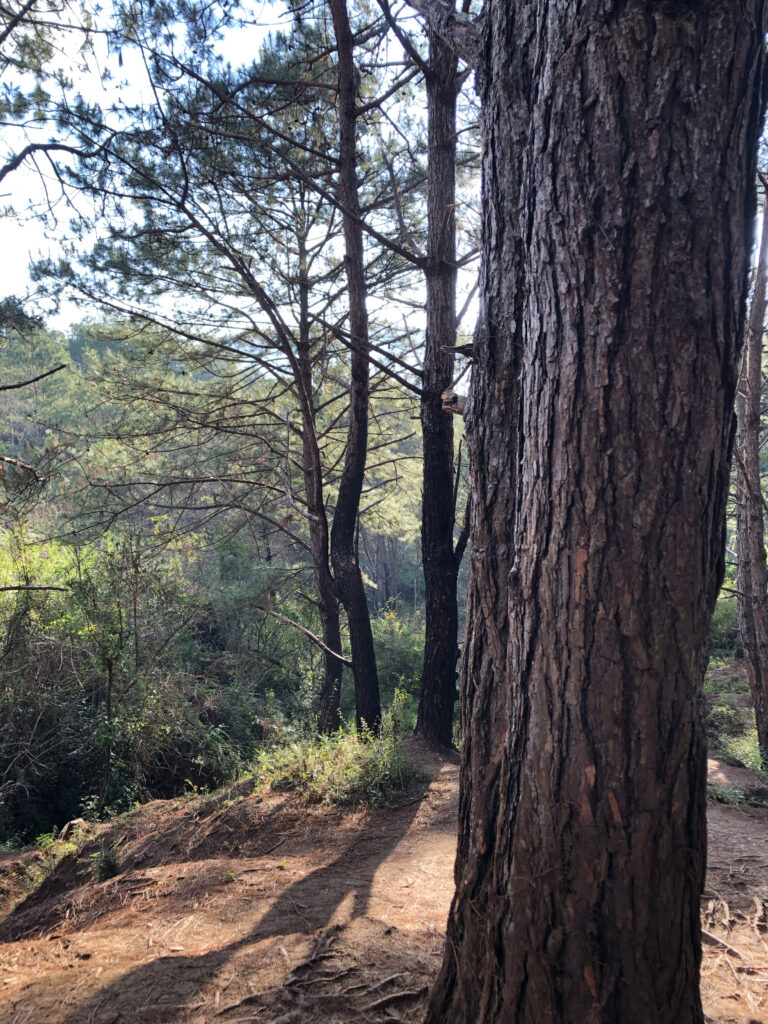
As seen from the photo above, the source of light is the morning sun in the background. There isn’t much left to see for the blue sky but it is there, reflected from the edges of the leaves covering morning sky. The ground is lit up and few shadows for the nearby trees are casted on it.
Finally, the the foreground, we see the close-up of the tree bark – our star of the composition. Look how the light is somehow reflected on the left side and the bottom and right side is very much darker and shaded.
These are some of the key things I remember as I observe the photo before I even take out my materials.Keep this practice every time you paint so you are guided as you carefully work on your artwork.
Steps in Painting Tree Bark Wood Texture in Watercolor
The process for this painting will involve how I set the background before painting the bark. In watercolor I always paint the background first, to establish a base for the whole composition, then slowly adding in the necessary details and finally working on the subject.
1. Painting the background. After sketching important details in the painting, I masked the edges of the bark and painted the sky and the greenery together to have a nice blend and thus creating an out of focus feel.
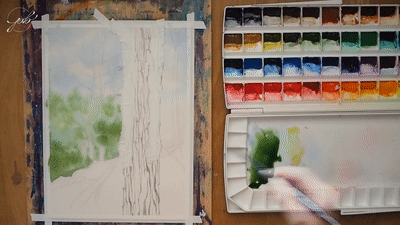
Then for the nearer trees at the background I painted the leaves using a foliage brush using a wet on dry technique in green ad yellow-green colour for those touching the sunlight. For the bushes at the bottom, I painted it the same way using darker mixture of green.
Then I set the base wash for the ground and slowly worked on the details of the soil.

Subsequently, I worked on the branches of the trees behind using a dark brown mixture. For the farthest tree, I used a light wash.
Then I blended the leaves to the sky by adding in blue wash using the foliage brush at the edge of the leaves, as I have observed from the photo. This intensified the shape of the tree. Then I added the shadows of the nearer trees.

Then I proceeded to add more details to the ground. until I was satisfied and I let the painting dry. Once dried, I removed the masking tape to prepare for the next step: Painting tree bark wood texture in watercolor.
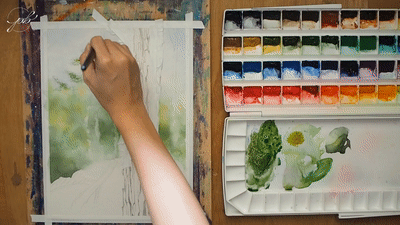
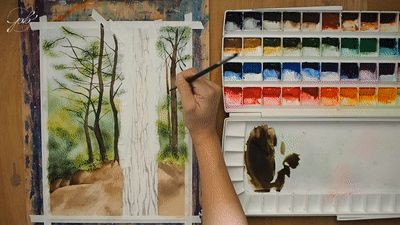
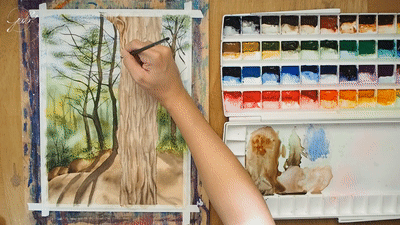
2. Painting tree bark wood texture in watercolor. After letting the painting dry, I moved on the the main subject of the painting. This step involved looking at the reference painting many times, observing and analysing the details that I see as I paint.
For starters, I set the base of the painting with a light wash of brown but adding in a darker tone for me to remember the dark part of the bark.
Then after letting the first wash dry, I added the bark texture following my sketch.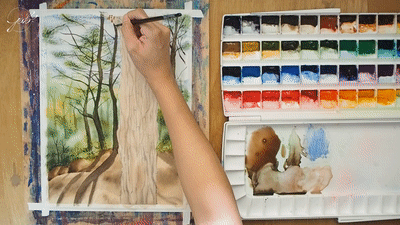

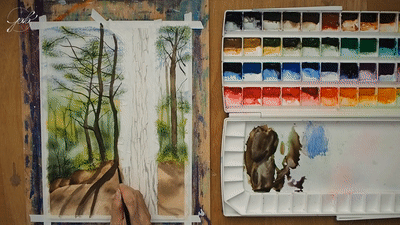
Then I slowly worked on the layers for the bottom part as this part is darker. I blended the darker strokes, making the details of the bark more prominent. I worked very slowly using layers of paint in tea to coffee consistency.

Then repeating the previous step as the painting dry in parts, to slowly add more layers.
Remember that some bark textures have a squarish cracks and this is the texture of this particular tree that I was working with. So I maintained that squared shape throughout the whole bark, and as I go along, I used darker mixture of paint.
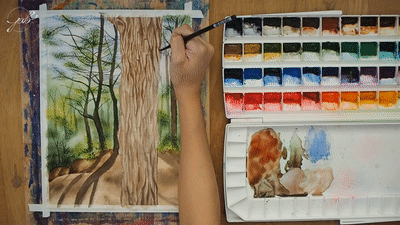
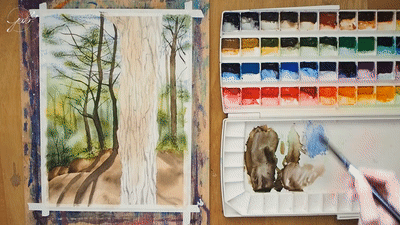
Then adding an even darker details with darker wash to blend as well.
Then finally adding the darkest in milk consistency, at the top part of the bark.

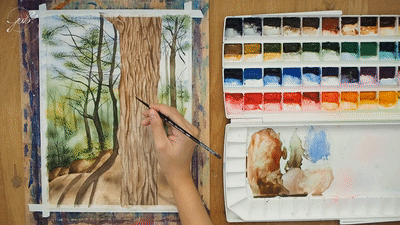
Then I slowly worked my way towards the rest of the painting. It was a series of repeated methods, working layer-by-layer. I was going for a detailed look so yes, I added more layers of repeated Step 2.
Then I added more contrast at the bottom right and top right of the bark. and some darker wash as well

As a finishing touch I used a very dark neutral tint to add more details for the bark’s deepest cracks.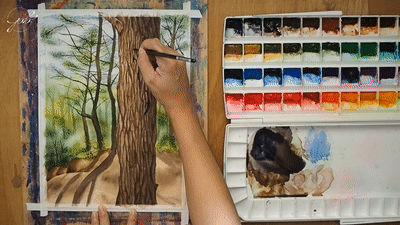

Then when I was satisfied with the look of the tree bark, I signed the painting and removed the tape.
The Finished Painting
Here’s the final piece! I learned a lot in this painting, especially patience in painting tree bark wood texture in watercolor. There were times that I was doubting whether I was making it the right way, but really, it’s after adding on the darker details that the painting comes to life. But needless to say, setting the base tone is important to make those dark details look more real.
So yes – always set the base, especially in watercolor, since the paint is transparent. We need to slowly build the tone, light and shadow, and finally the details that breathe life to it.
I hope you get what I mean and that you learn a lot in this blog post as well. You may want to try this too in painting any wooden things like fence, or bench. let me know if you find this blog useful!

9″x12″ Watercolor on Cotton Rough Paper (300gsm)
You can watch the process video on youtube to understand more, and if you follow through my tutorial, please feel free to tag me with your painting on Instagram so I can see your artwork too! For more tutorials like this, you can browse my youtube channel! Do hit the subscribe button to stay updated with the posts. Thank you!
Tags: artbarkforestlandscape watercolorM. GrahamPortia Barucscenic paintingtraveltreeswatercolor forestwoods
Comments are closed.