
9 Steps in Painting the Bruges Belgium Canal in Watercolor

Painting the Bruges Belgium Canal in Watercolor is achievable using different brush techniques. In this blog post, I will be sharing with you how I painted this scene from a photo I took on my trip to Bruges, Belgium in 2019. I will be sharing notes of the lessons I learned and some mistakes I realized after completing the painting.
I remember that it was a pleasant cloudy day in Bruges Belgium. It rained for a while when we arrived but thankfully the rest of the trip was dry. I and my friends were walking around the cobbled streets when I saw this nice scenery by the bridge overlooking a canal.
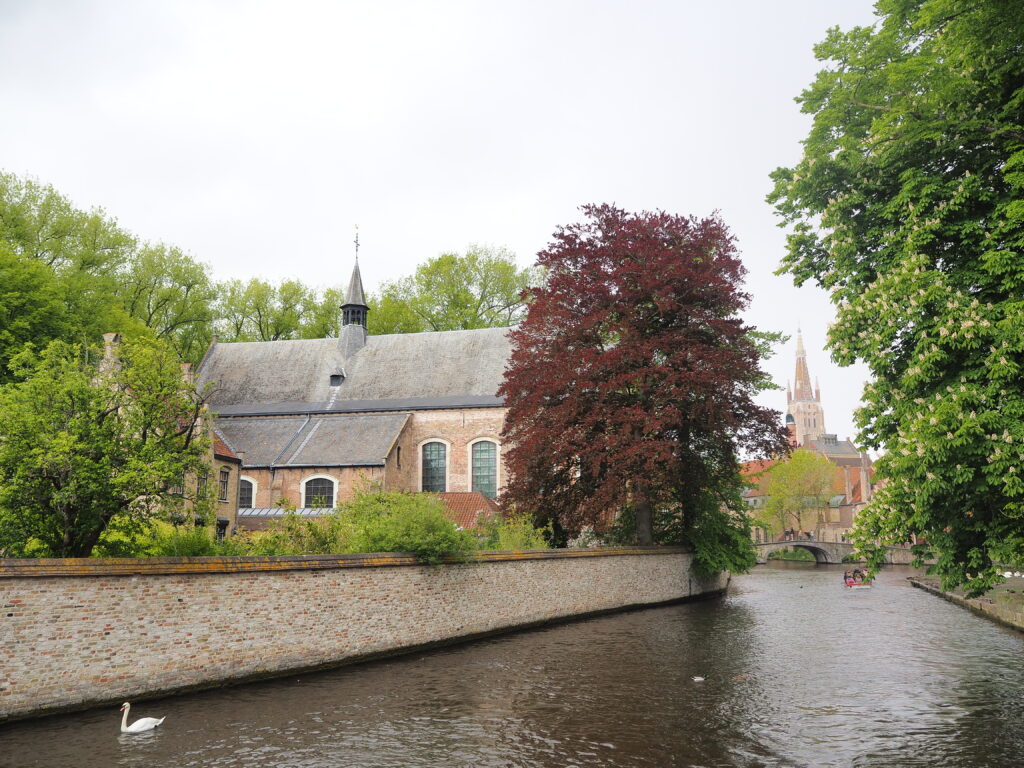
The Reference Photo
This is the reference photo for the painting. It’s an interesting composition having nature and man-made structures come together in lovely colors. The canal runs from the front to the back, giving a nice depth. You will see a crimson-coloured tree off-center as well which draws attention together with the building behind it.
Steps in Painting the Bruges Belgium Canal in Watercolor
1. Sketch the important details of the painting, and start the base colour. Having observed the reference photo, we need to sketch the important elements in the painting, mainly the canal walls, the buildings, and the trees. Keep your sketch minimal to avoid seeing visible sketches on the finished painting.
Then, start painting the base color for the sky and the water. Since it is a cloudy day and the overall feel of the painting is muted, I used Payne’s Grey for the initial wash.
Note: Having realised a better way of doing this painting, I recommend doing step 6 while the sky is still damp.
2. Painting the greenery. After the first wash has dried, paint in the greenery. For the trees,I used a mixture of Hansa Yellow Deep and Sap Green, and for the darker green, I added a bit of Payne’s Grey.
Start painting the highlights in random tapping strokes for the tree on the right, then slowly adding in the darker greens for depth. Repeat this process until you complete the tree.
Then repeat the same process for the trees on the left side of the painting.

Go back to the tree on the right and paint in more details using the darkest green mixture.
3. Painting the ground and the wall. I mainly used Burnt Umber and Raw Sienna for this part of the painting. For the ground at the right side, I painted the base layer for both sides using these two colours, blending in the darker tones for the shadows.

Then I used the same brown mixture for the canal wall on the left side, and added in Payne’s Grey to the base, touching the water. I blended some Payne’s Grey to the water as well.
4. Painting the Buildings with as much detail needed using the same brown and grey mixtures.
Note: In any painting composition, decide on your palette first and always use those colors in different combinations and ratios to achieve different hues and tones. This makes the elements of the painting blend together very well and makes the overall painting look natural.
Paying close attention to the reference photo, I slowly worked on painting the windows and roof, adding textures using wet on dry technique.
While waiting for the paint to dry, I added the branches of the trees behind.

Then I painted more details until I felt the building is complete.

5. Painting the Crimson tree. Since it’s right beside the building in the composition, it’s good to start painting this tree right after the building. For a start, I used Maroon Perylene with a bit of Burnt Umber.
To add more detail to the leaf texture, I switched to a foliage fan brush. I blended red with green for a more natural look.
6. Painting the background (Recommended to do this together with step 1). I painted the background in a very light wash, or “tea” consistency.
Note: After I did the painting, I realised that this should have been painted right from the start, while the sky area was damp, to add more out of focus feel. This is one of those moments that I learned my mistakes and thus, it reminded me how to do better in my succeeding artworks.
7. Painting the reflections and Canal Wall’s base. Wet the canal area and start painting the reflections of the surroundings, mirroring the colors. Paint in horizontal strokes and let the pigments blend on paper.
Paint the Crimson tree’s branches and add in a darker red for more depth.

Start on the canal wall’s base color by adding in darker tones, and concurrently, intensifying the reflections in the water.

8. Painting the brick texture. After setting the base of the canal wall, I started painting the bricks in different shades and color, following what I see from the reference photo.

Note: Based on this experience, it was quite a painful amount of effort painting each brick one by one using a small round brush. I also then realised I could have used a small flat brush instead. It would have been a lot easier as one stroke is enough to make one brick shape. Lesson learned once again 🙂
9. Painting the water details. Moving back to the canal, I added in the waves using mostly a light wash of Payne’s Grey, with a mixture of some of the colours reflected.
After completing the water, the painting is finally done. I then signed and removed the tape.
The Finished Artwork
I hope that you learned a lot from painting the Bruges Belgium Canal in Watercolor and that you learned how to avoid the mistakes I made along the way. Keep in mind that every time you paint, you learn something new. So yes, pick up that brush and start painting! 🙂
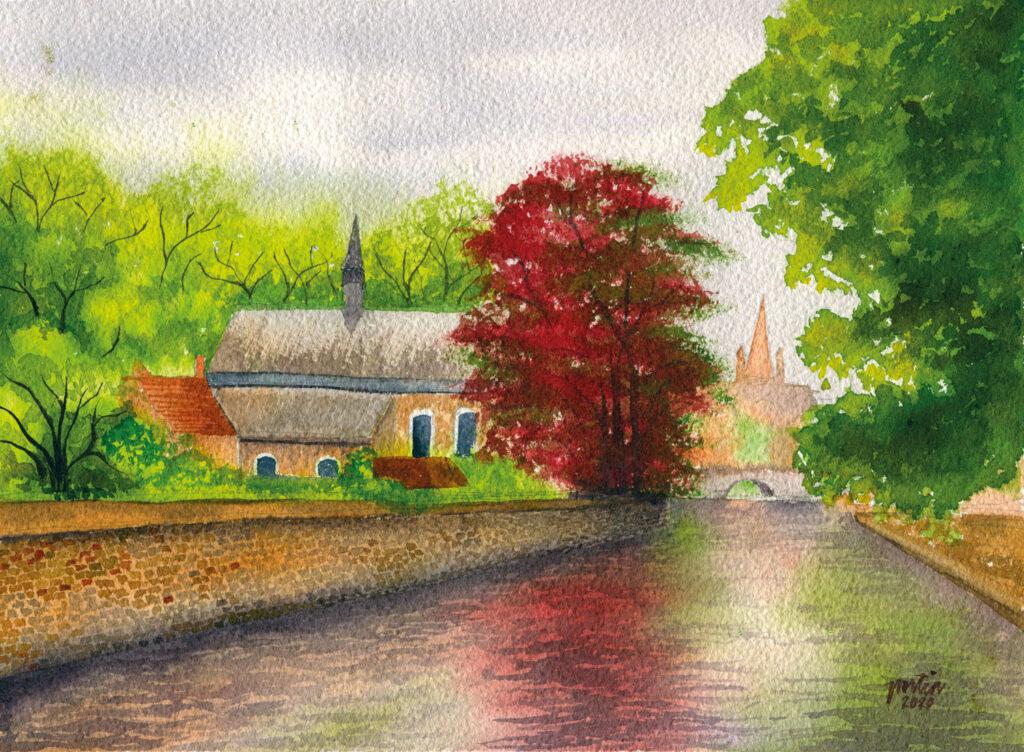
9″x12″
Watercolor on Cotton Rough Paper (300gsm)
You can watch the process video on youtube to understand more, and if you follow through my tutorial, please feel free to tag me with your painting on Instagram so I can see your artwork too! For more tutorials like this, you can browse my youtube channel! Do hit the subscribe button to stay updated with the posts. Thank you!
Tags: artbruges belgiumlandscape watercolorM. GrahamPortia Barucscenic paintingtravelurban watercolorwater reflection
Comments are closed.