
How to Paint Watercolor Night Camping Scene in 9 Easy Steps

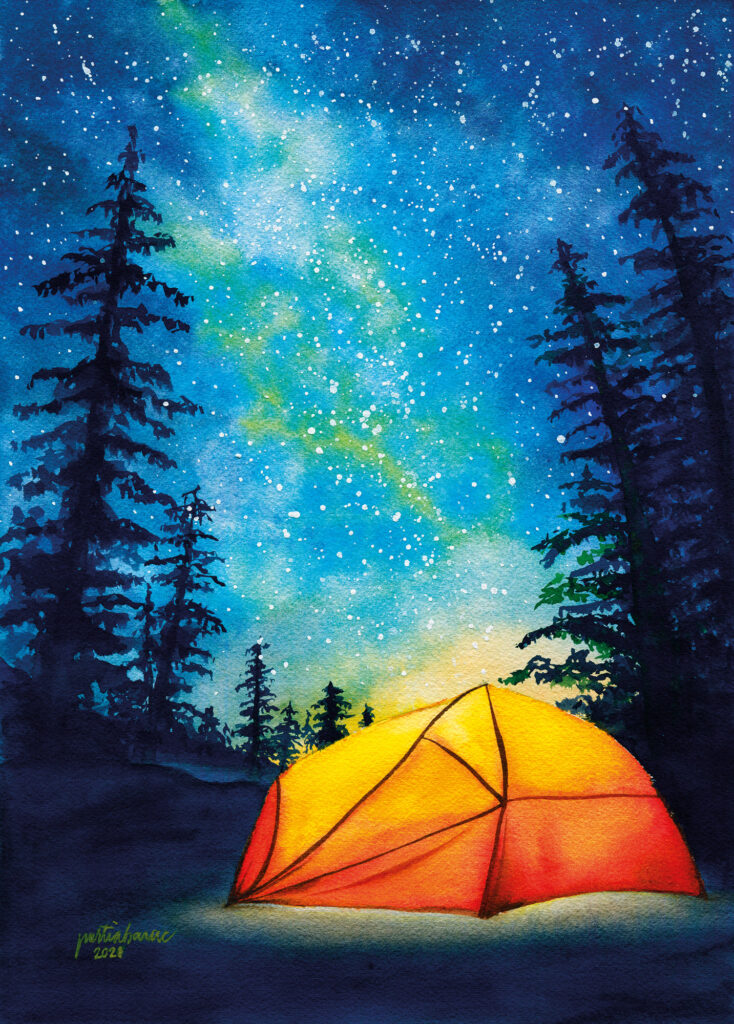
Early in 2021 I was inspired to create watercolor galaxy painting, like last year. This time I wanted to make it more interesting by painting a watercolor night camping scene. In this watercolor composition, I painted a tent by the woods. I love how the illuminated tent turned out and the starry night sky is always fun to paint.
Watercolor Night Camping Scene Painting Process
Here’s a step-by-step guide in painting the night camping scene:
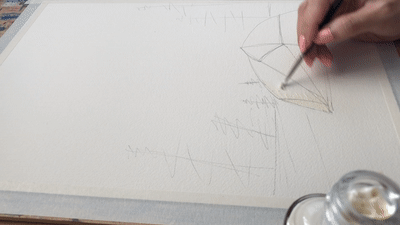
1. Sketch the important details of the painting. In this case, it’s the tent in the foreground which is our subject and a hint markings for the surrounding trees in the background.
2. Mask it with masking fluid and tape. Masking fluid and tape come handy in watercolor. For one, the tape helps to secure your paper on the board, especially when you’re not painting on the block.
The masking fluid instead helps to cover the tiny details you would wanna leave untouched when you’re making large washes. In this painting, since I was planning to paint the tent in bright yellow, I didn’t want to have an undertone of anything from the first wash, so I traced the outline of the tent with the masking fluid. Then I covered the larger areas with the tape.
3. Start painting the night sky using a wet-on-wet technique. I slowly worked on the layers by adding more paint, spraying water, and tilting the paper to help the pigments spread. I keep repeating these steps until I achieve the desired starry night sky.
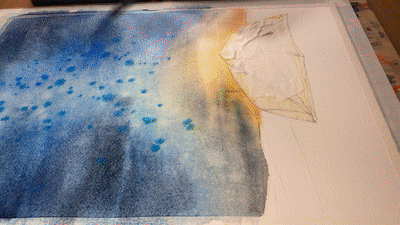
4. Start painting the ground. Here I used a dark blue – gray tone, making sure I leave enough white below the tent for the light. 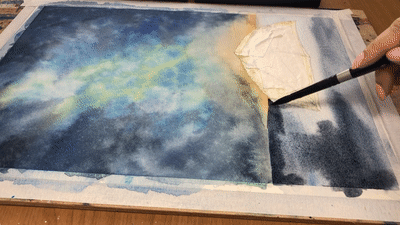

5. Painting the pine trees. Build up the pine trees, starting with the branches. I did it this way so I’m reminded of the placement of the trees in the composition.
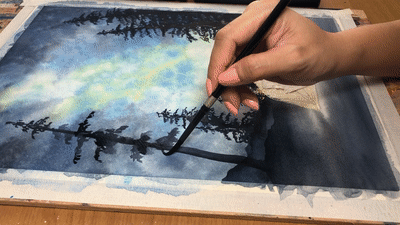
Remember that trees need not be in same sizes and shapes. The more random the trees are, the more realistic and natural the painting will look like because in the rule of nature, no two trees are exactly alike.
6. Sprinkle the Stars! This is one of my favourite part! Sprinkle the stars on the night sky with white gouche. Make sure you cover the trees with scrap paper or cloth while doing so.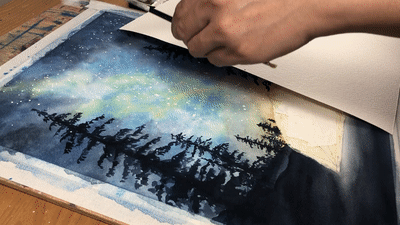

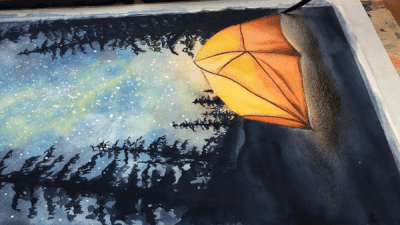
7. Painting the lighted tent. Peel off the masking fluid and start painting the tent in yellow. Add in some details with a bit of orange and browns and blend in the colours.
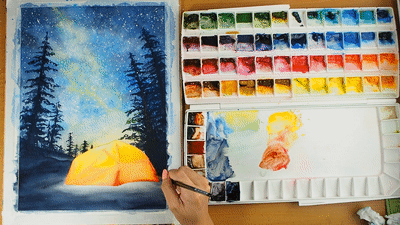
8. Finishing touches. After painting the tent, we add on earth color to the ground to suggest the warm light from the tent, and further blending it with the dark grey to make the lighted area more contrasting.
9. Finishing the painting. Sign your artwork, peel the surrounding masking tape and you’re done!
And that’s how we paint a Watercolor Night Camping Scene! How do you find the steps? Do let me know by commenting on the youtube video, or better yet – tagging me with your painting on Instagram so I can see your painting too! For a more details of the painting process, watch the full video above, or watch it straight from our youtube channel. I hope you find this painting process useful in your creative journey! Thanks so much and always, happy painting!
Night Camping Scene Finished Piece
Comments are closed.